Make

Introduction - The Tool
This project is about creating an open source tool for making objects from paper pulp. These instructions offer a starting point for those of you who wish to get involved as well as an inspiration for those wishing to improve, develop and use the design.
The following step by step guide will help you through the process of building the FORMiT tool. Further pages on this site such as mould and pulp take you through the process of creating a mould for your tool and forming some paper objects.
This version of the FORMiT tool is designed to be made with hand tools, however, power tools will speed up the process.
PART 1
Tools & Materials
Materials
- Plywood 600x800x9mm
- Wood screws - 25mm, 16mm
- Pipe fittings - Solvent Weld Tank Connector 42mm, Solvent Weld Swivel Bends - 92.1/2° 42mm
- Danish oil - 250mm
- Double sided sticky tape
- Suprglue
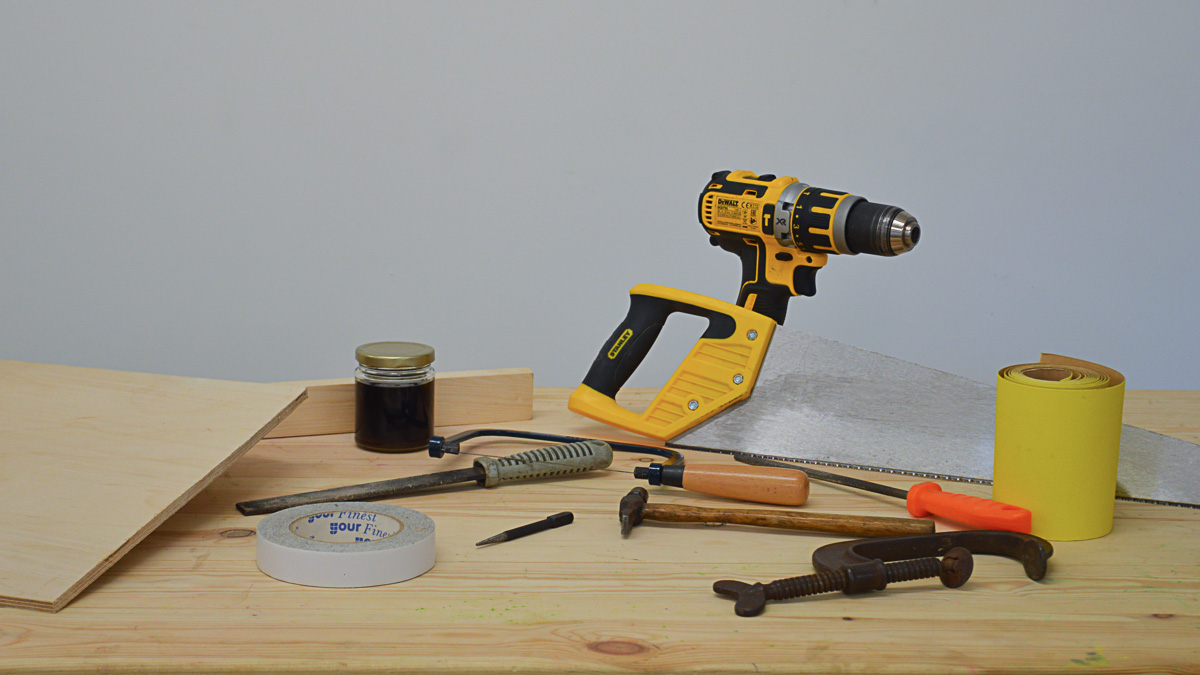
Tools
PART 2
Cutting out the plywood panels
Part 1 outlines the process of cutting out the different plywood pieces of the FORMiT tool. If you are lucky this part can be as simple as pressing print on your CNC router, in this case, download the DXF file in the tools list. However, if you only have limited tools the following instructions will show you how to cut these pieces with hand tools.
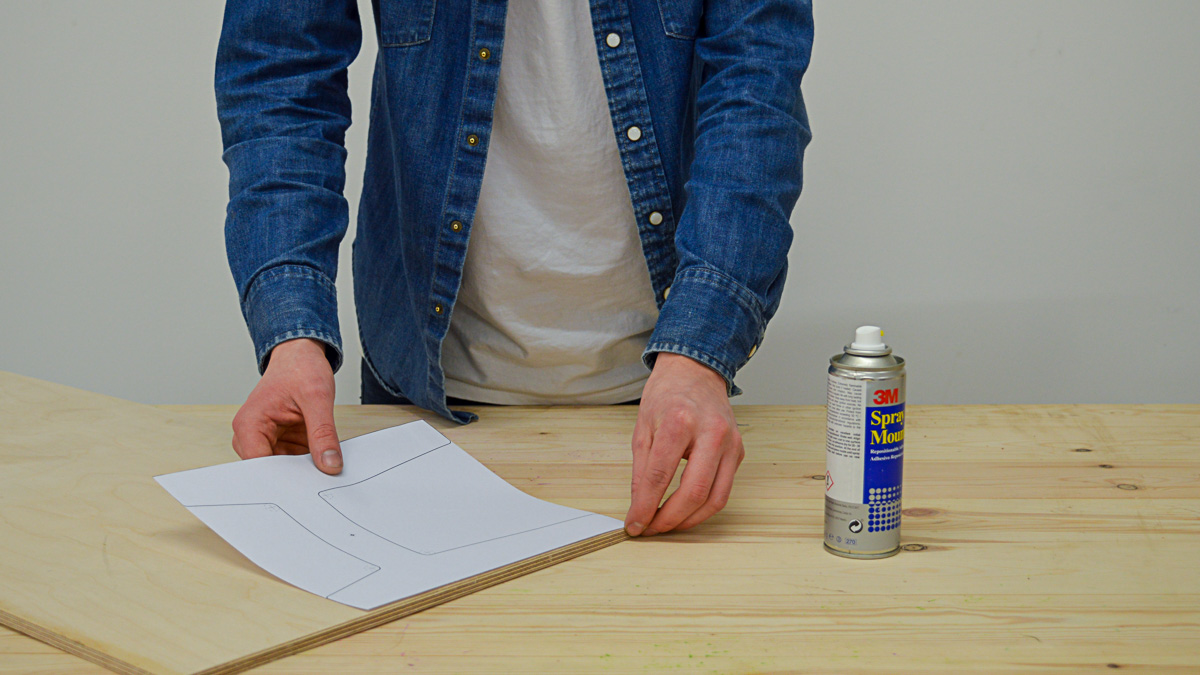
Section 1 - Printing sticking cutting paths
Start by printing the cutting path PDFs found in the tool list, these are in A4 and A3 depending on the printer you have access to. Some sections of the A4 printouts will need piecing together, this will be indicated on the print out. Once printed, spray mount and stick these cutting paths onto your 9mm plywood, lining up the edges of the plywood and cutting paths.
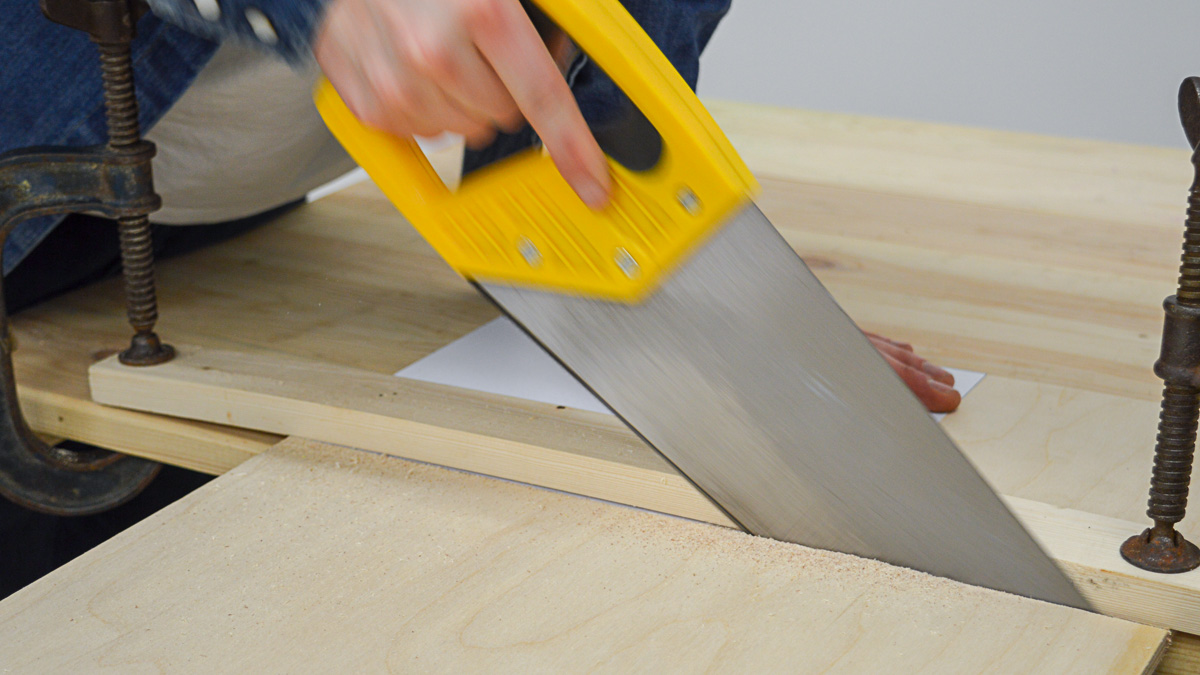
Subsection 2 - Cutting the plywood
All the straight edges of the pieces should be cut first, the easiest way of doing this is using a table saw or band saw. If you do not have access to these tools, clamp a square length of timber along the edge you wish to cut, use the timber as a guide for a hand saw to cut straight. These edges can be squared up and finished later.
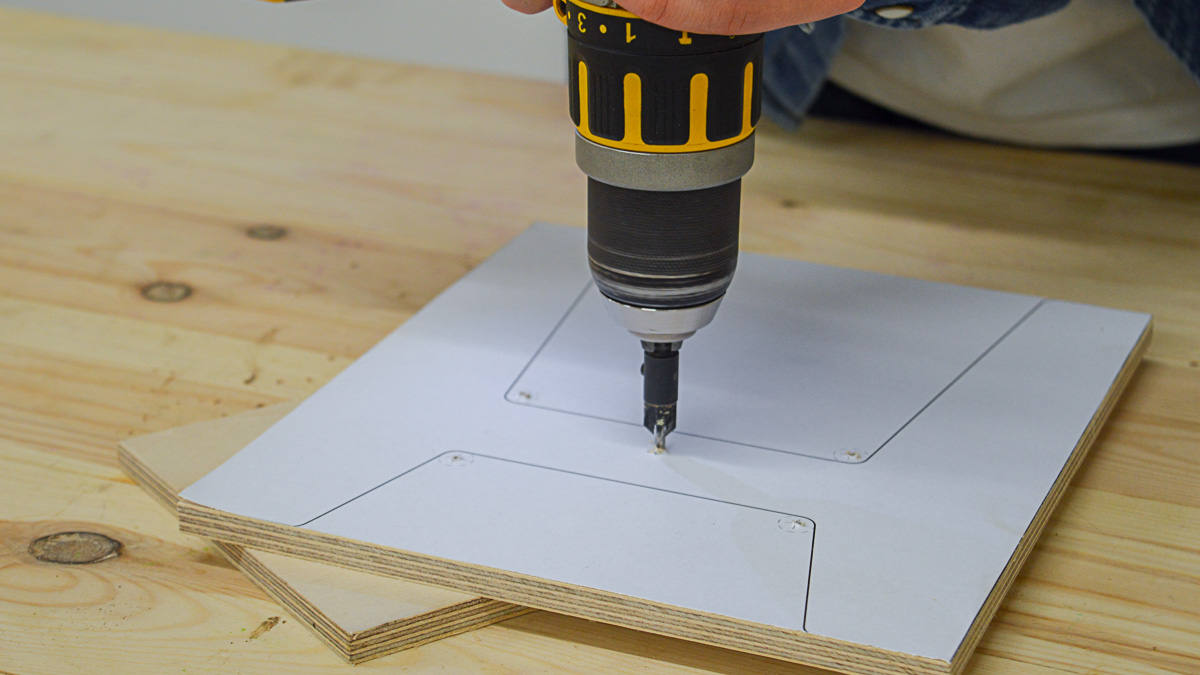
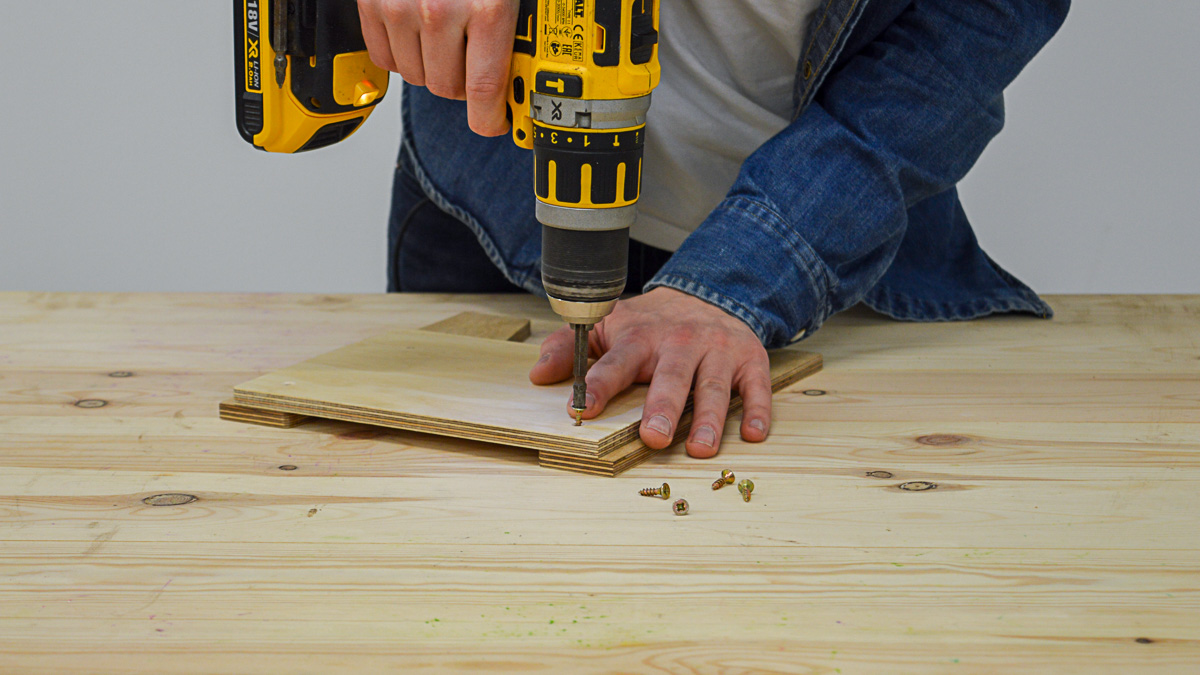
Now all the straight edges are cut, some of the pieces will be done such as the inner panels and cross pieces. However, for the remaining pieces, drill the holes marked on the printouts, these will be indicated as pilot holes or as the size of drill bit needed. Prior to drilling, centre mark all the holes as seen in image above.
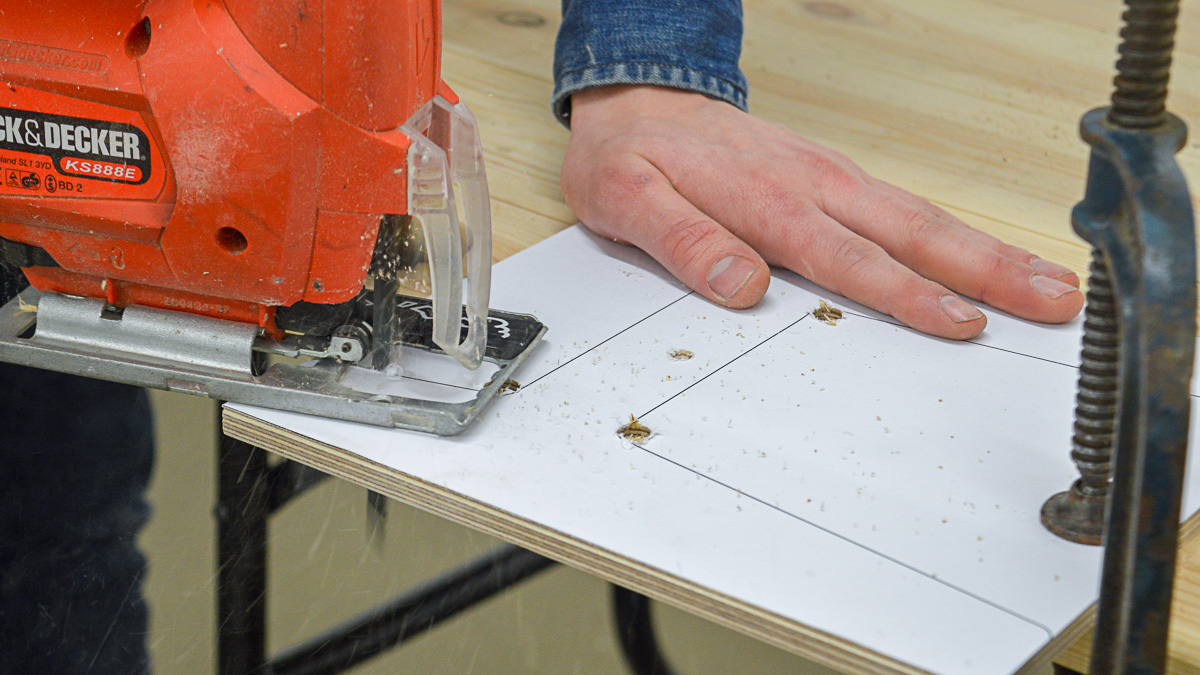
The cutting path should indicate 10mm drill holes on the outer panels, once these are cut a jigsaw can be used to follow the lines and join up the holes which will removes the unwanted plywood sections as seen in the image above.
For the front and back panels there are two slots to cut into the plywood, the corners of which can be made with a 2mm drill bit as indicated, then cut out with a coping saw. Finally, the base plate is drilled with a 50mm forester bit or hole saw in the centre.
PART 3
Finishing the plywood panels
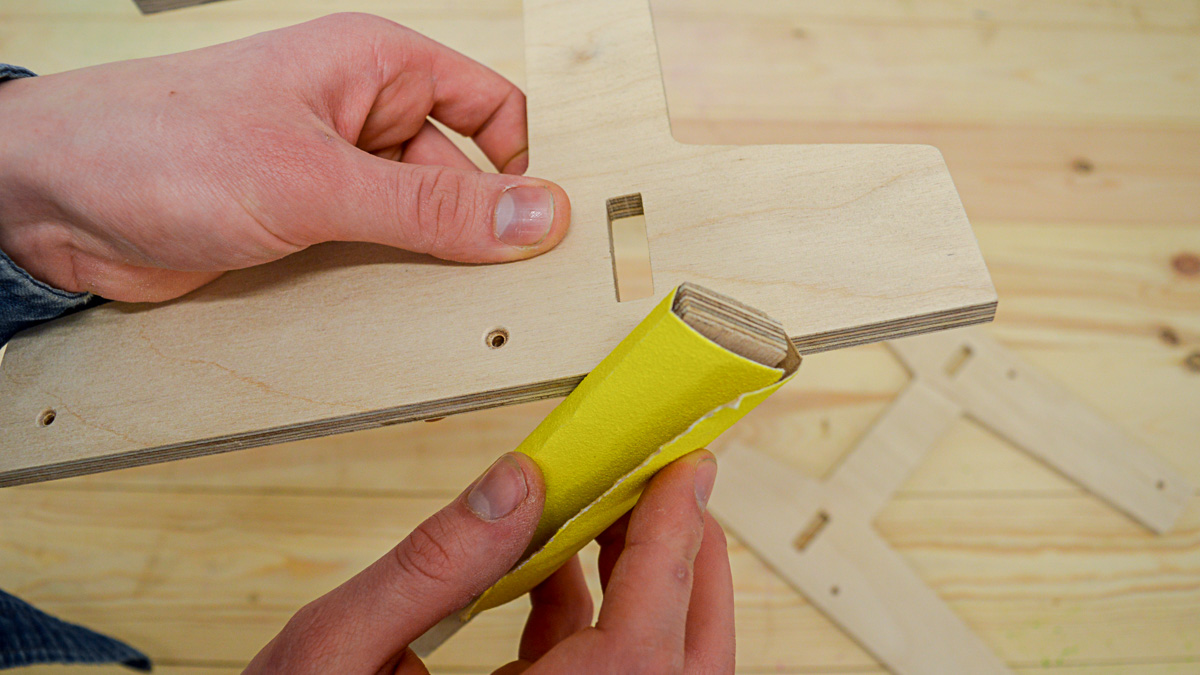
Once all the pieces have been cut and drilled they can be finished. All the cut edges should be squared off with wood files. Then all the faces and edges of the plywood should be sanded with 120 grit paper. This process is easier with a palm sander but can still be done by hand with a sanding block.
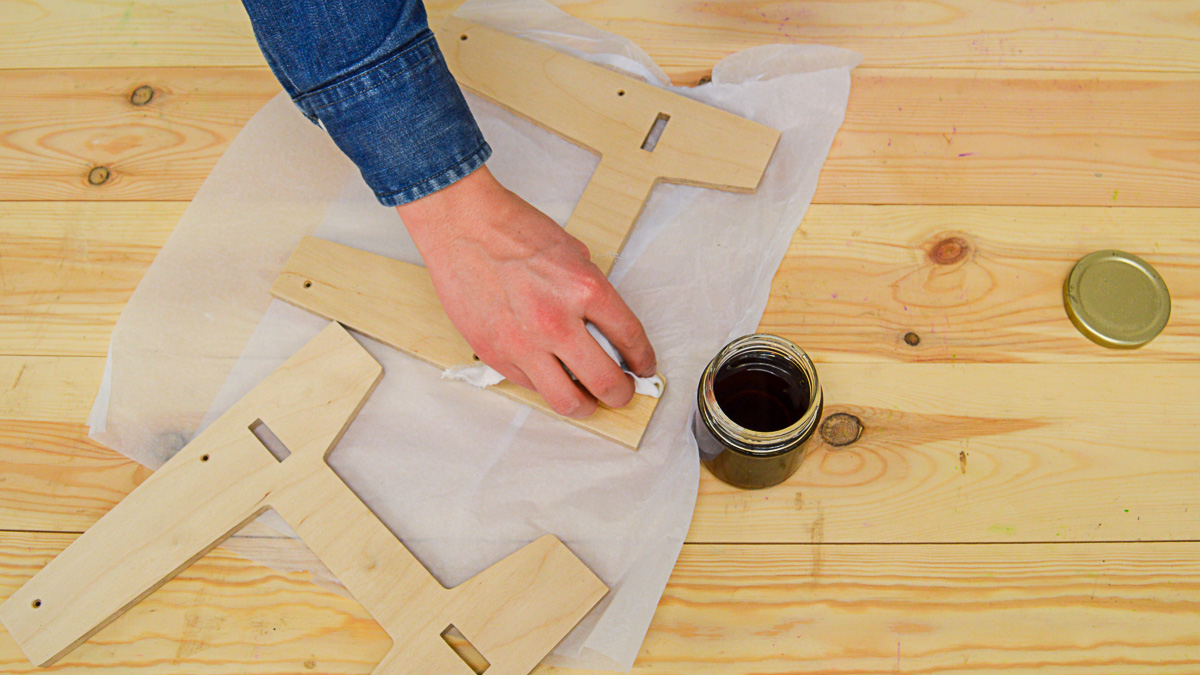
Now all the pieces are the correct shape and have been sanded smooth, a final finish can be applied. Apply Danish oil to the surface and edges of the plywood with an old rag. Leave the pieces for 15 minutes then apply again, rub down with wire wool or sandpaper between coats. The Danish oil seals the plywood and prevents damage from water, these pieces should be left for 1-2 hours before final assembly.
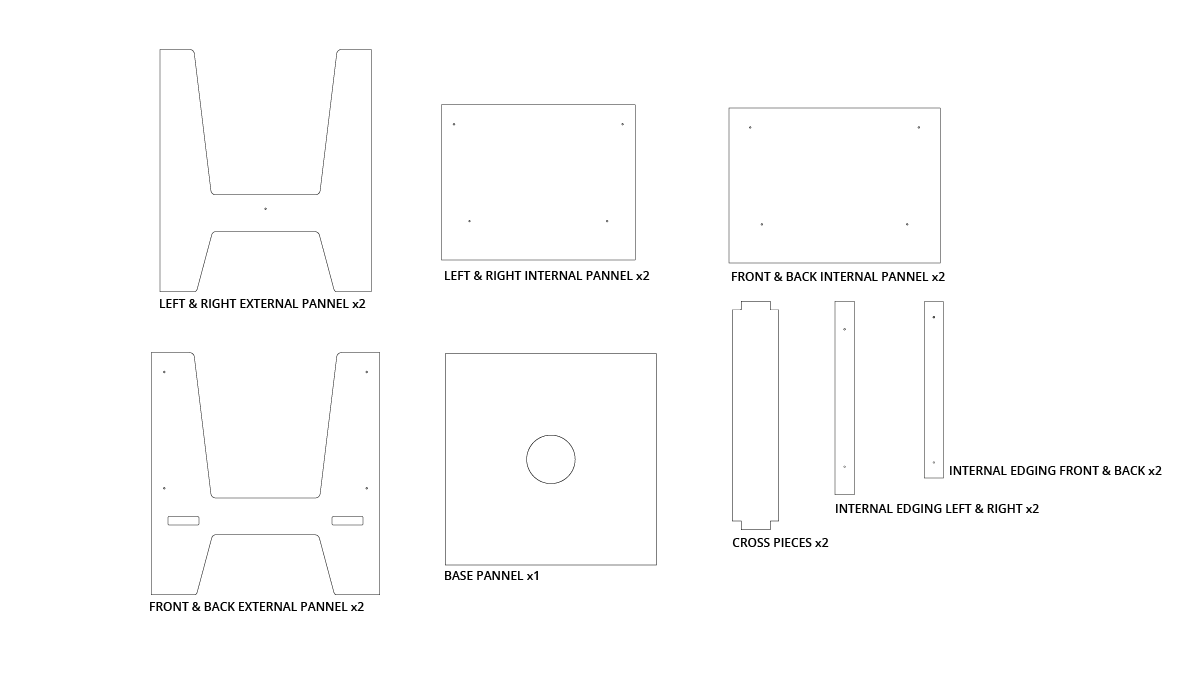
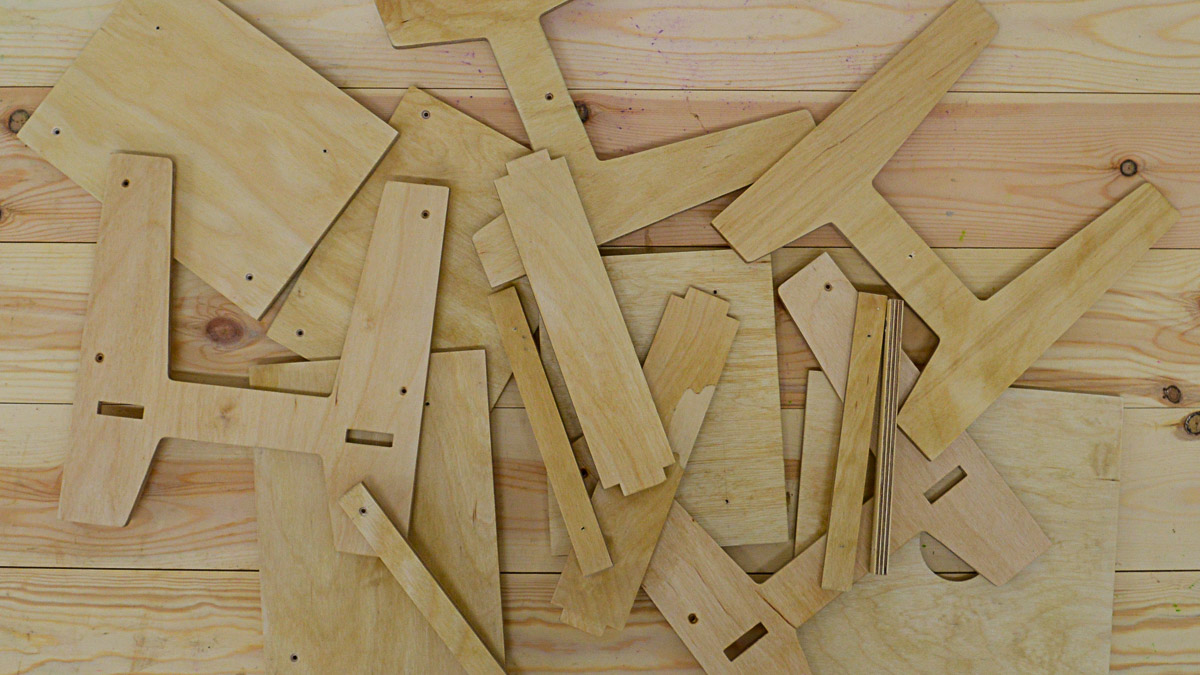
After all of the pieces have been finished and the Danish oil has dried, the tool can be assembled. The image above shows the name and quantities of all the parts you should have.
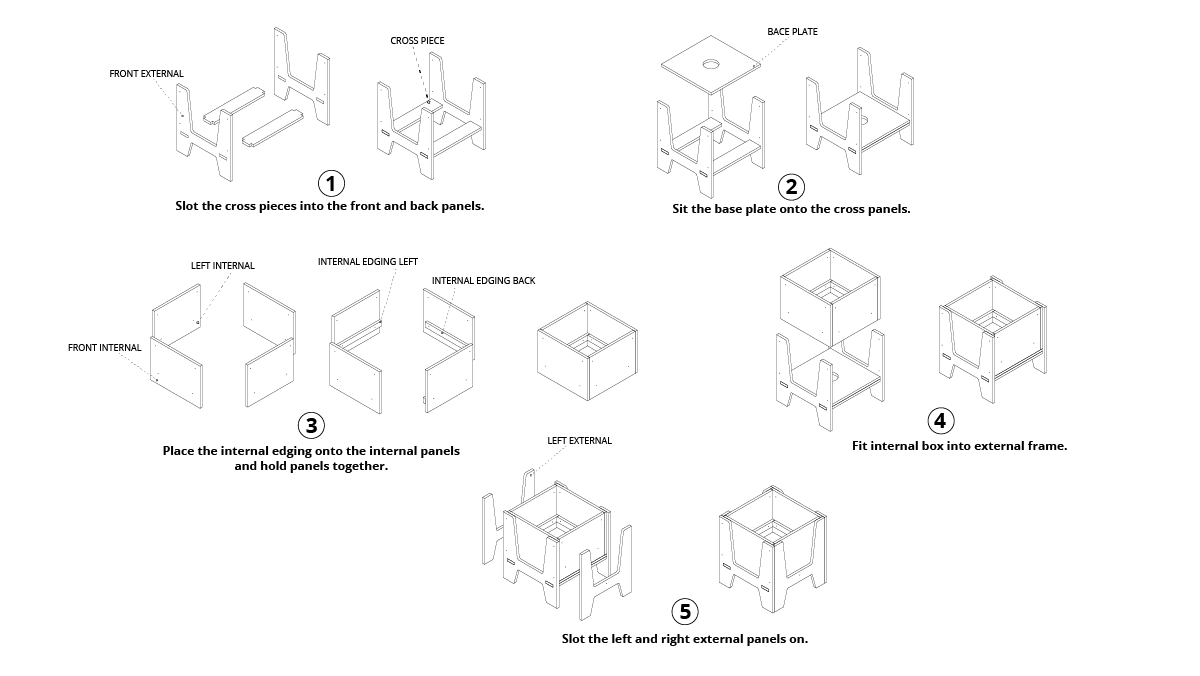
Dry fit all these using the assembly drawing above and used double sided sticky tape to hold the front and inner panels together. These panels can then be removed and screwed together.
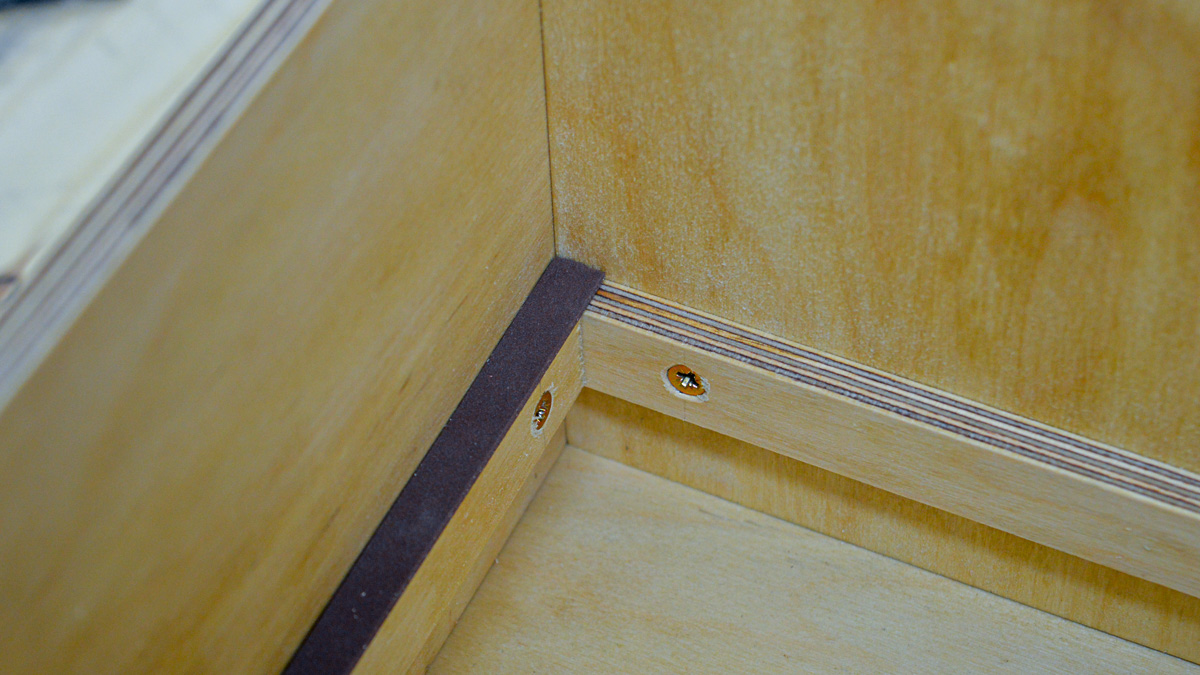
Before assembling the internal panels screw the edging ply to them, the screw holes should line up to match the edging with corresponding panel.
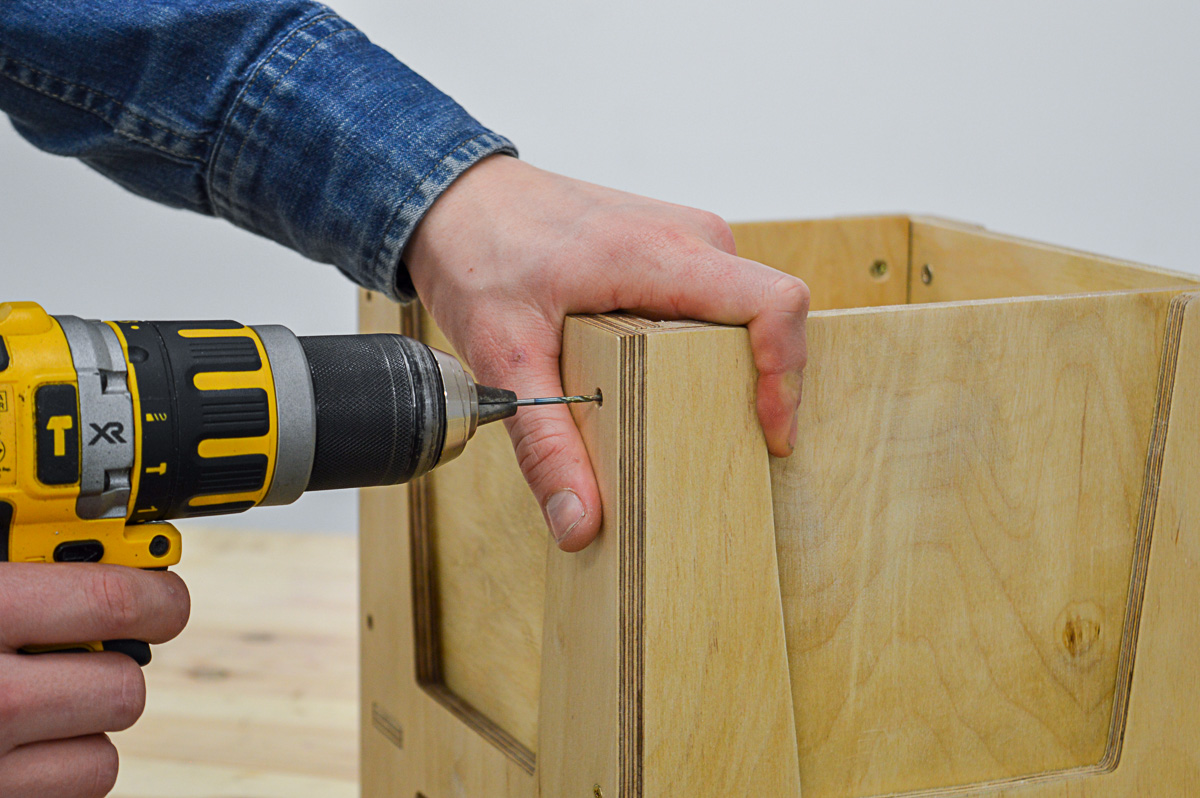
Now all of the panels can be assembled together. Pilot dill all the holes with a 1.5mm drill bit, then follow with 25mm screws.
PART 4
Making it air tight
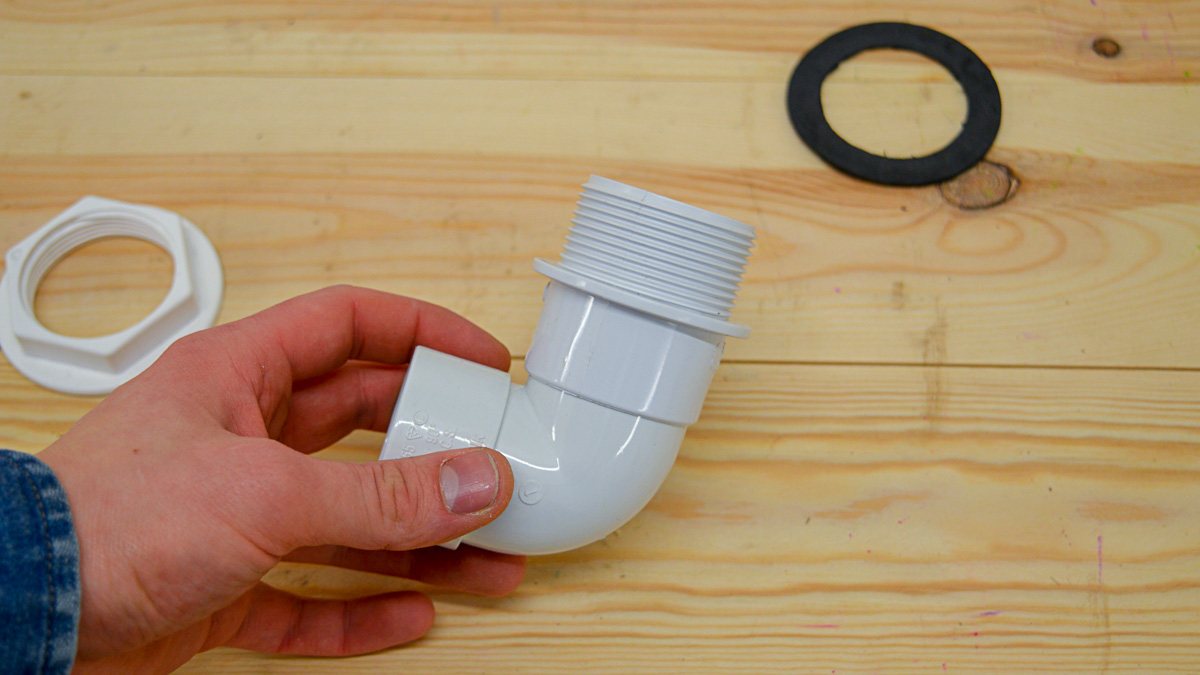
The tool at this point will be pretty much finished, just the final touches left. Adding the connection point for the wet and dry vacuum is the next step. Start by piecing the tank connector and 90-degree bend together, this could be glued with PVC weld, however, in most cases the fit will be tight enough not to.
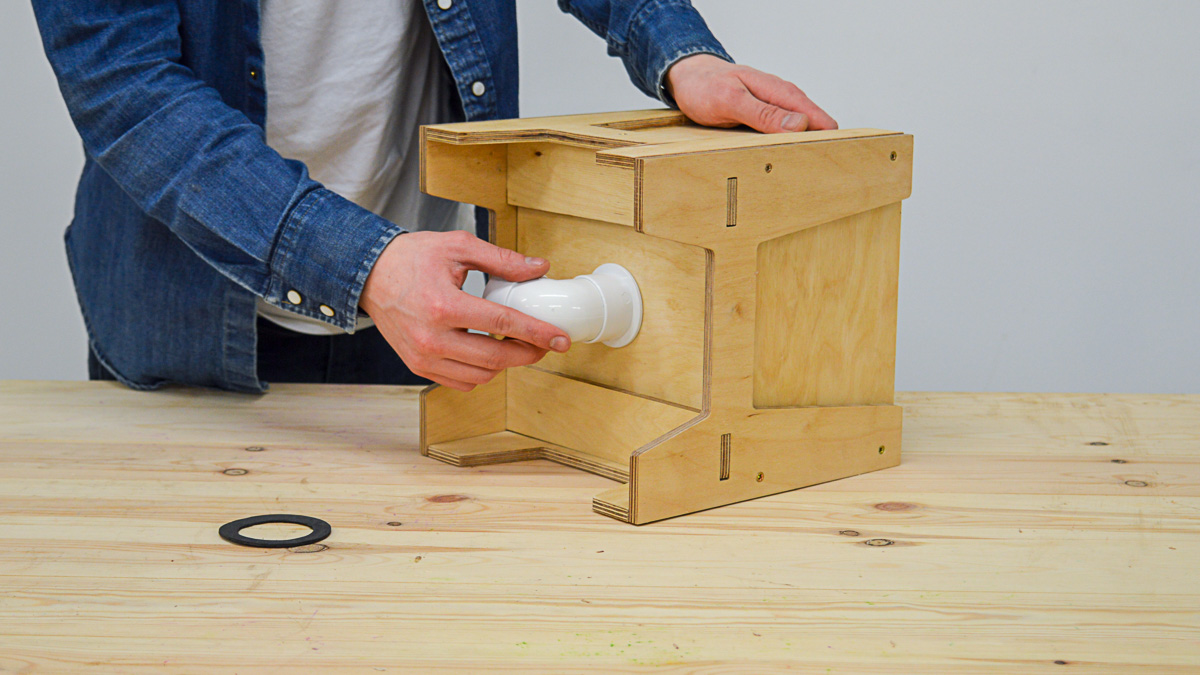
After assembling the connectors, slot the threaded section though the 50mm hole, add the seal and screw the tank connector on.
The final stage is to add foam on the top of the internal edging. This will create an air seal against any mould when the tool is in use. The foam can be bought from arts/craft stores or online as A4 sheets, one will be enough. Cut the foam to 9mm thick strips and super glue a piece to each side of the internal edges.