Make
Introduction - The mould
Now you have your FORMiT tool you can start using it. You will first require a mould; there are many ways of making moulds, we challenge you could come up with your own! However, the following instructions will help you get started by showing the process of making our simple and cheap duck mould. The process is easy and requires minimal tools and materials.
PART 1
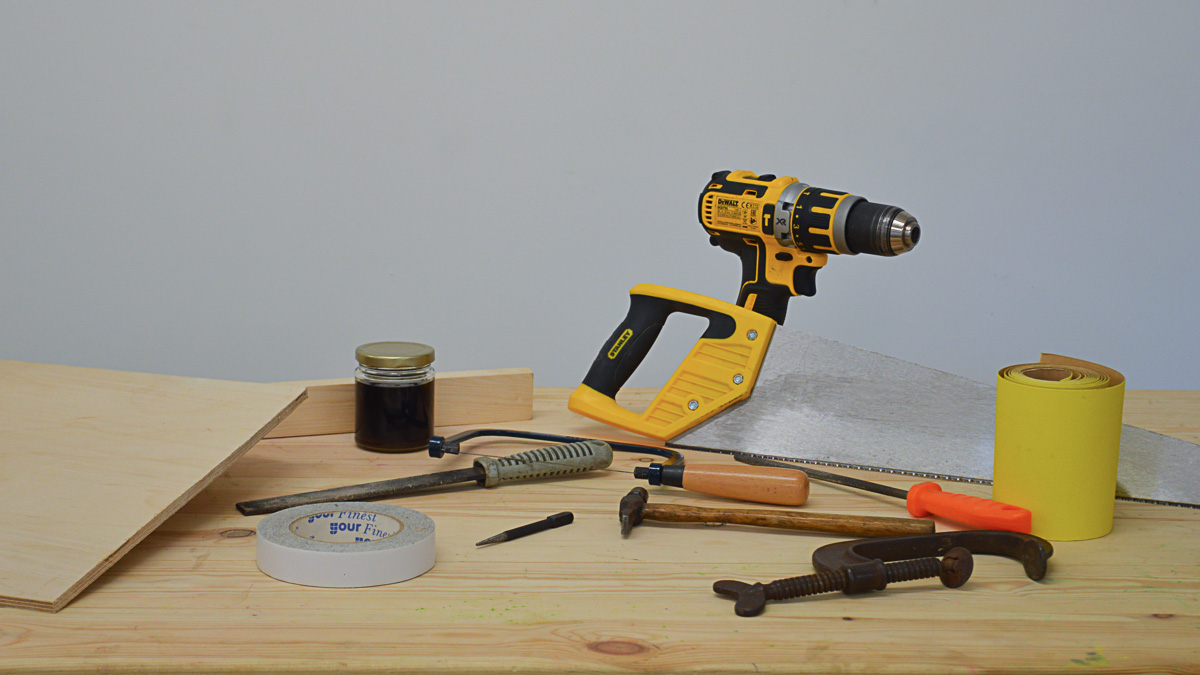
Tools & Materials
Materials
- Aluminium mesh 200x400mm minimum
- Plywood 195x195mm, 5mm thickness upwards
- 2D paten
Tools
- Small hammer
- Coping saw or scroll saw
- Pens/pencil
- Cutting path downloads:
A4

PART 2
Cutting out the profile
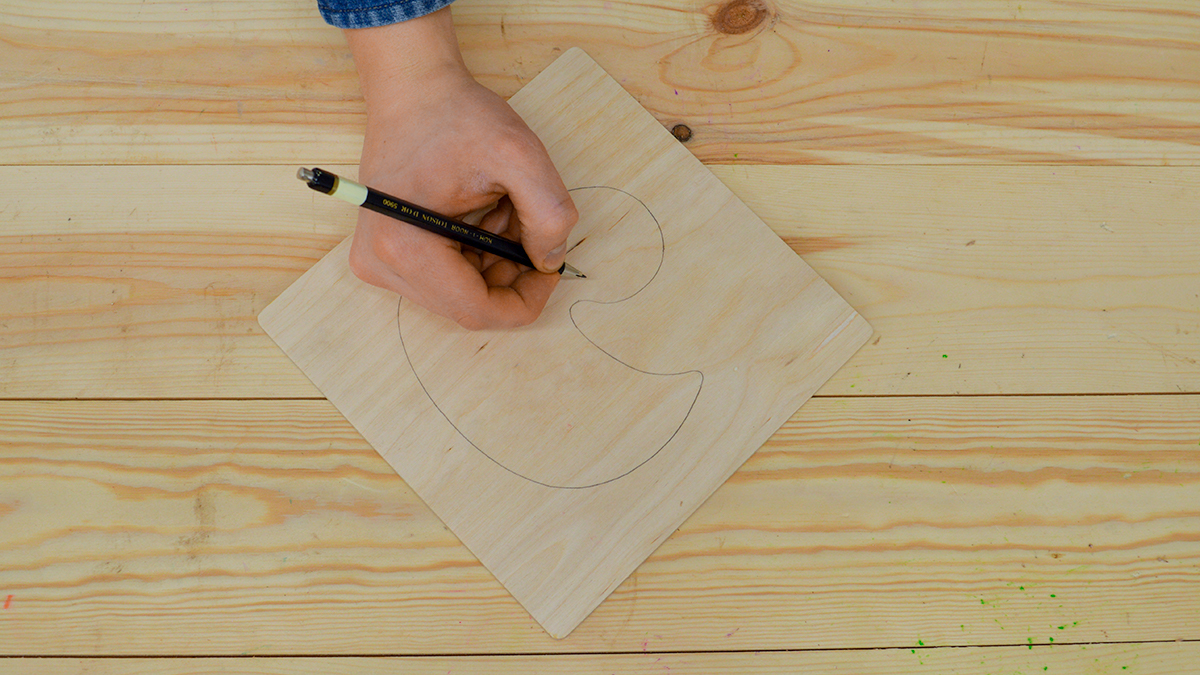
Start with your plywood square and draw your profile in the centre. This can be any shape you like; the following instructions will still apply. If you fancy making our duck download the pdf in the tools menu.
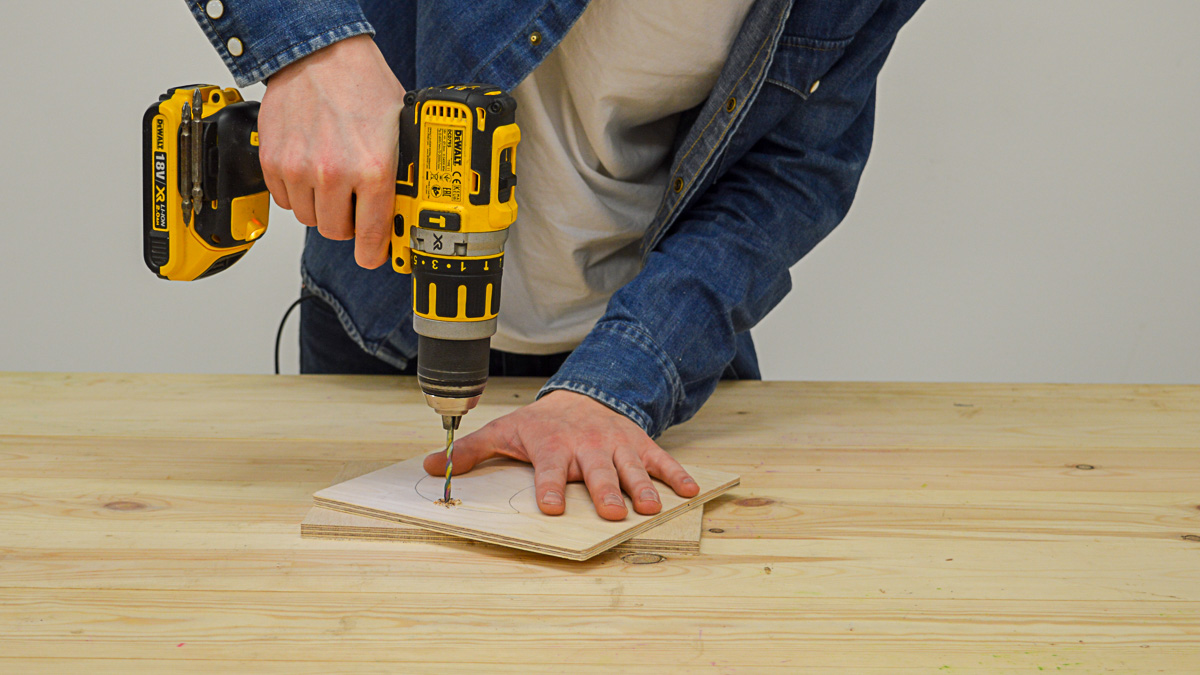
Once you have your cutting path on your plywood square, drill a 6mm hole through the plywood, make sure this is in the area you do not need. If making the duck, the hole is drilled inside the duck, next to the cutting path.
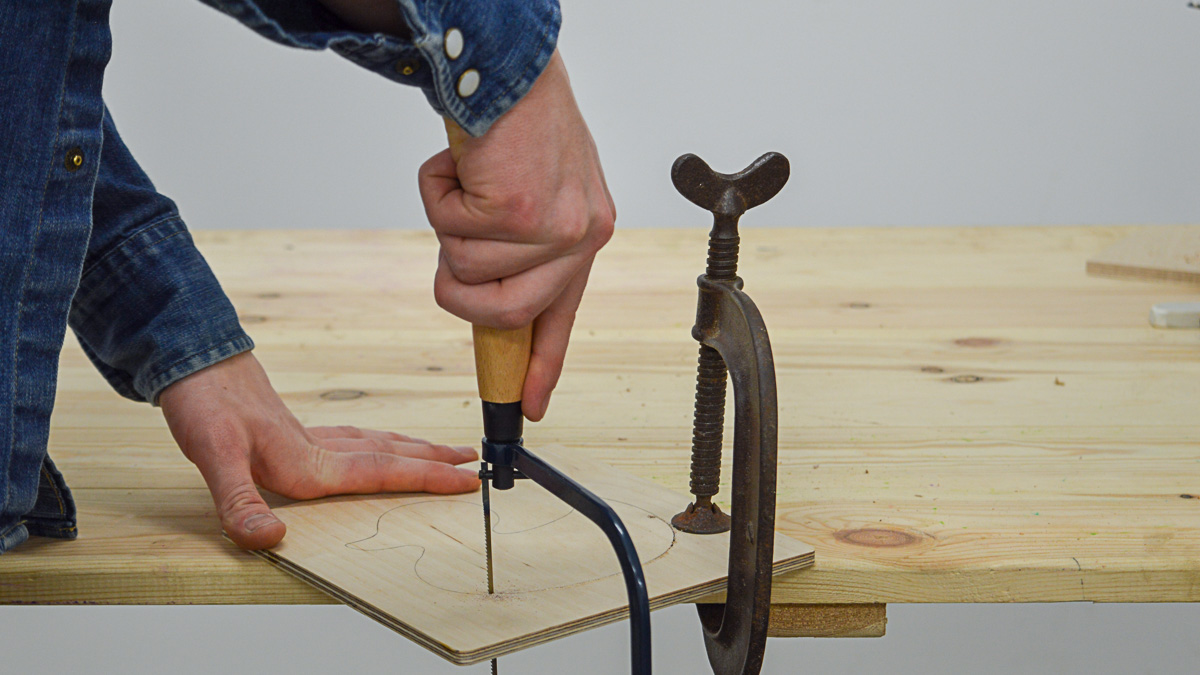
Thread a coping saw or scroll saw though the hole you have just drilled and follow the cutting path. Take your time, going too fast will cause your saw to veer off path. Clamping the plywood to your worksurface makes this process easier, you will need to un-clamp and move the duck around. The plan is to cut out the duck completely, leaving a plywood square with a duck shaped hole.
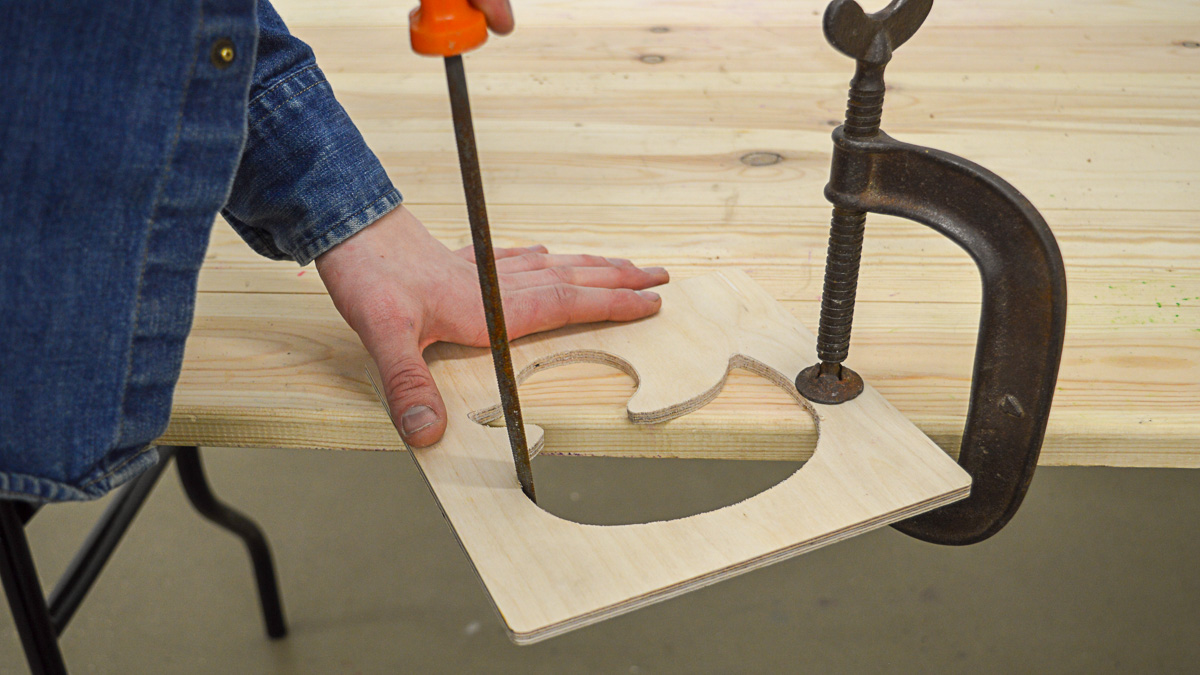
Finish the inside edges with a file and sandpaper, this doesn’t have to be too neat it shouldn’t affect the final shape.
PART 3
Tools & Materials
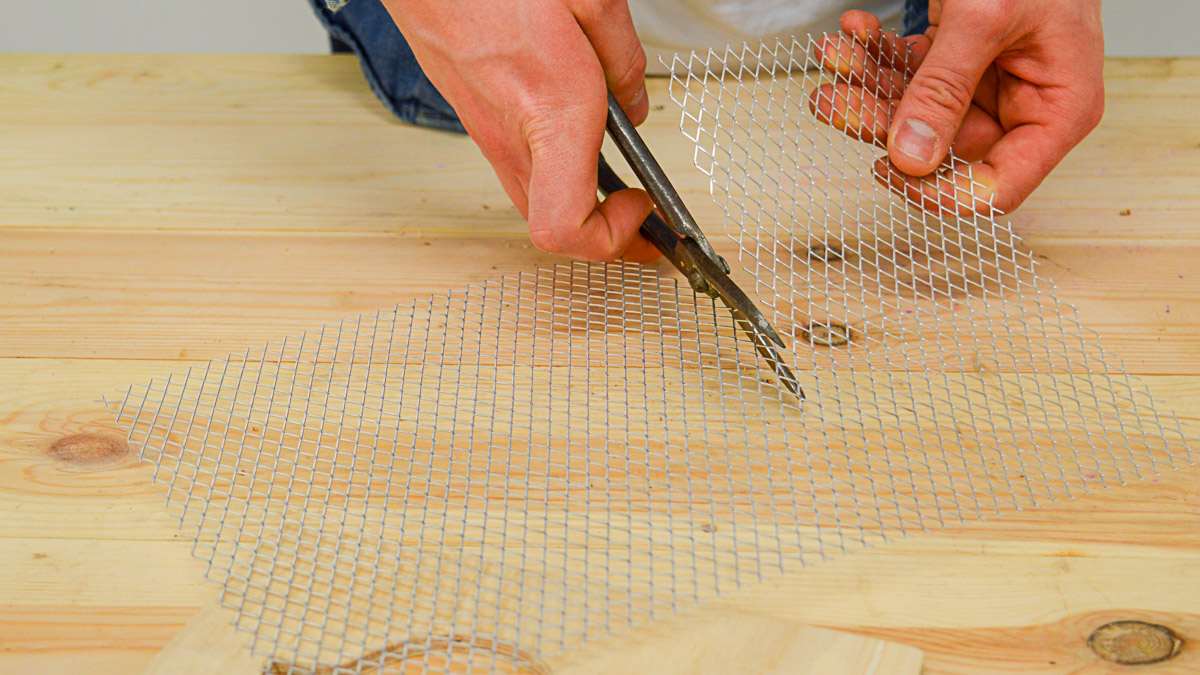
Cut out a 200x200mm square from the aluminium mesh. This material is very soft so can be cut with old scissors or sheet metal shears. The edges of this mesh can be quite sharp so ether finish with sandpaper or cover by folding tape over the edge.
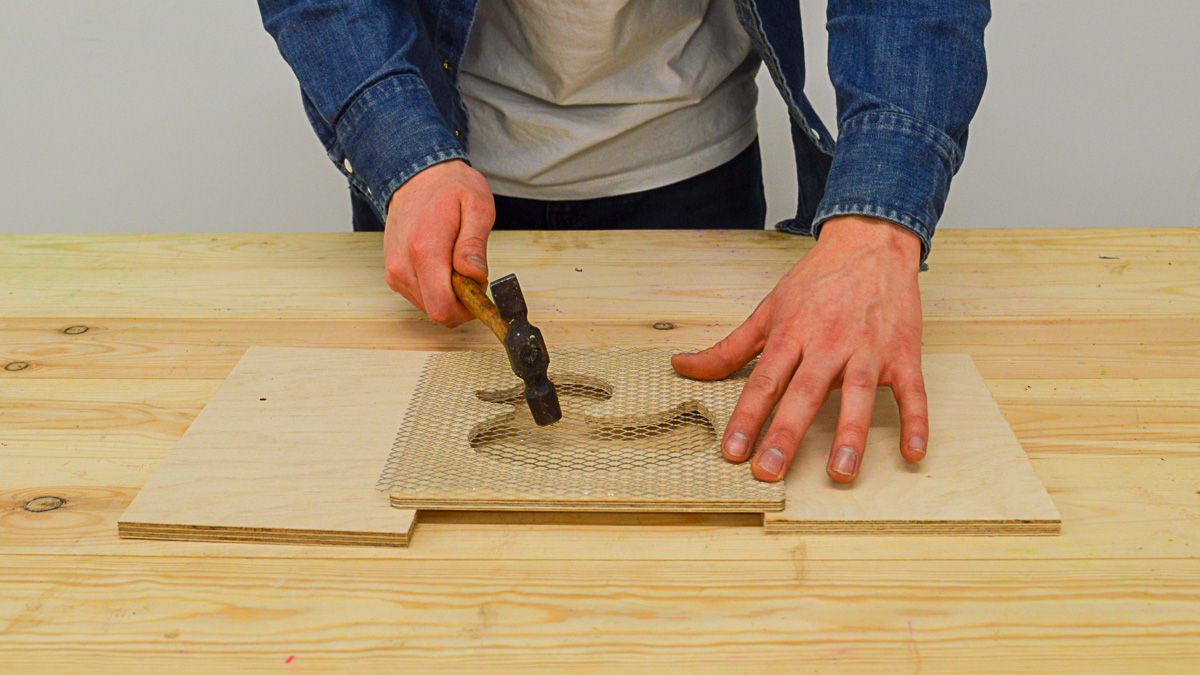
The aluminium mesh is extremely malleable, place it over the top of the plywood form and start pushing through, once this becomes too difficult follow it up using a hammer. Gently hammer around the form until you get your desired depth, adding spacers under the plywood prevents the mesh hitting your worksurface. If sections of the mesh start snapping, do not panic it will still work! however, this is a sign that you have hardened the metal and you will have to stop.

The plywood cut out should be flipped and the mesh moulding process should be repeated with a second piece of mesh. This will give two mirrored moulds for creating complete 3D objects.
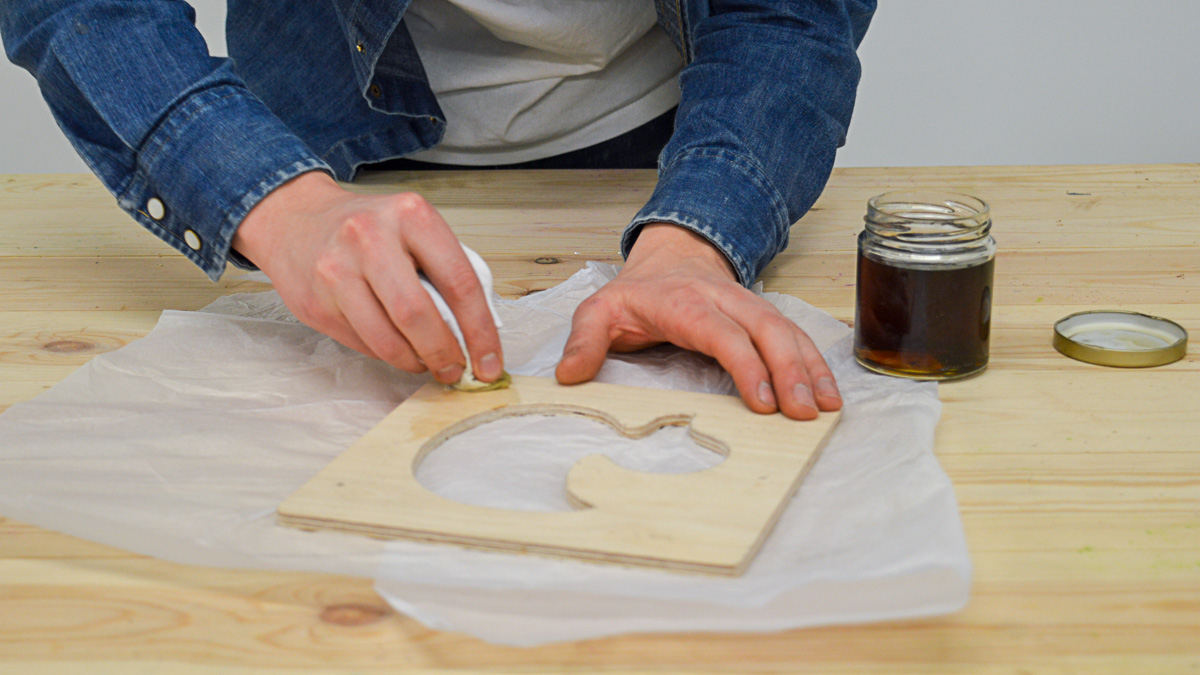
The plywood cut-out made in Part 1 is used as a structure during the paper moulding process. For this reason, the plywood needs to be sealed from water contact using Danish oil. Apply 1-2 coats of Danish oil with a 15 minute recoat time and allow the final coat to dry overnight.
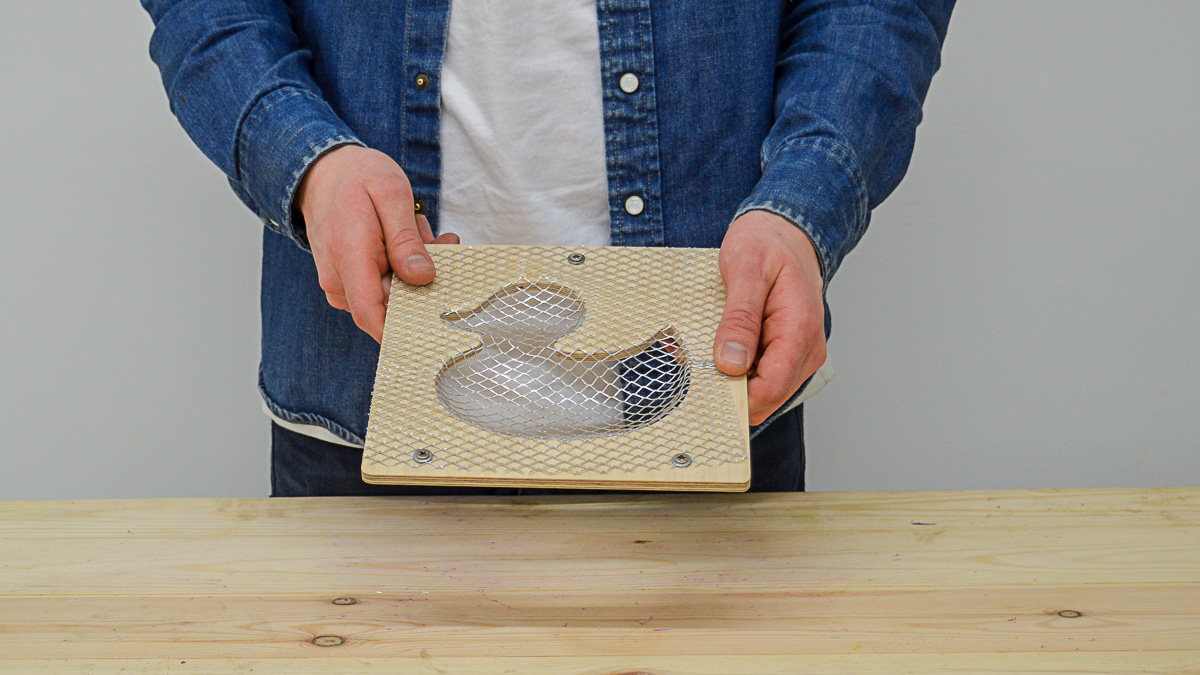
Screws and washers can be attached to the plywood to keep the mesh in pace. After this, you duck is done and you are ready to start paper pulping!